

 by
by Part 5 of Our Owner-Builder FIRE Journey Series
February flew by in a flash despite being the shortest month. In fact, we kicked things off with a well-deserved break, escaping to the Clearwater area. That’s one of the perks of Florida living—just a 30-minute drive from home and suddenly you’re in vacation mode!

While there, we made a strategic stop at a Tampa cabinet shop. We’d already received an impressively competitive quote from them, so seeing their quality firsthand was essential. Their ready-to-assemble (RTA) cabinets definitely made our shortlist. I’ll be tackling the installation myself—a move that’ll save us thousands in labor costs.
Electrifying Progress
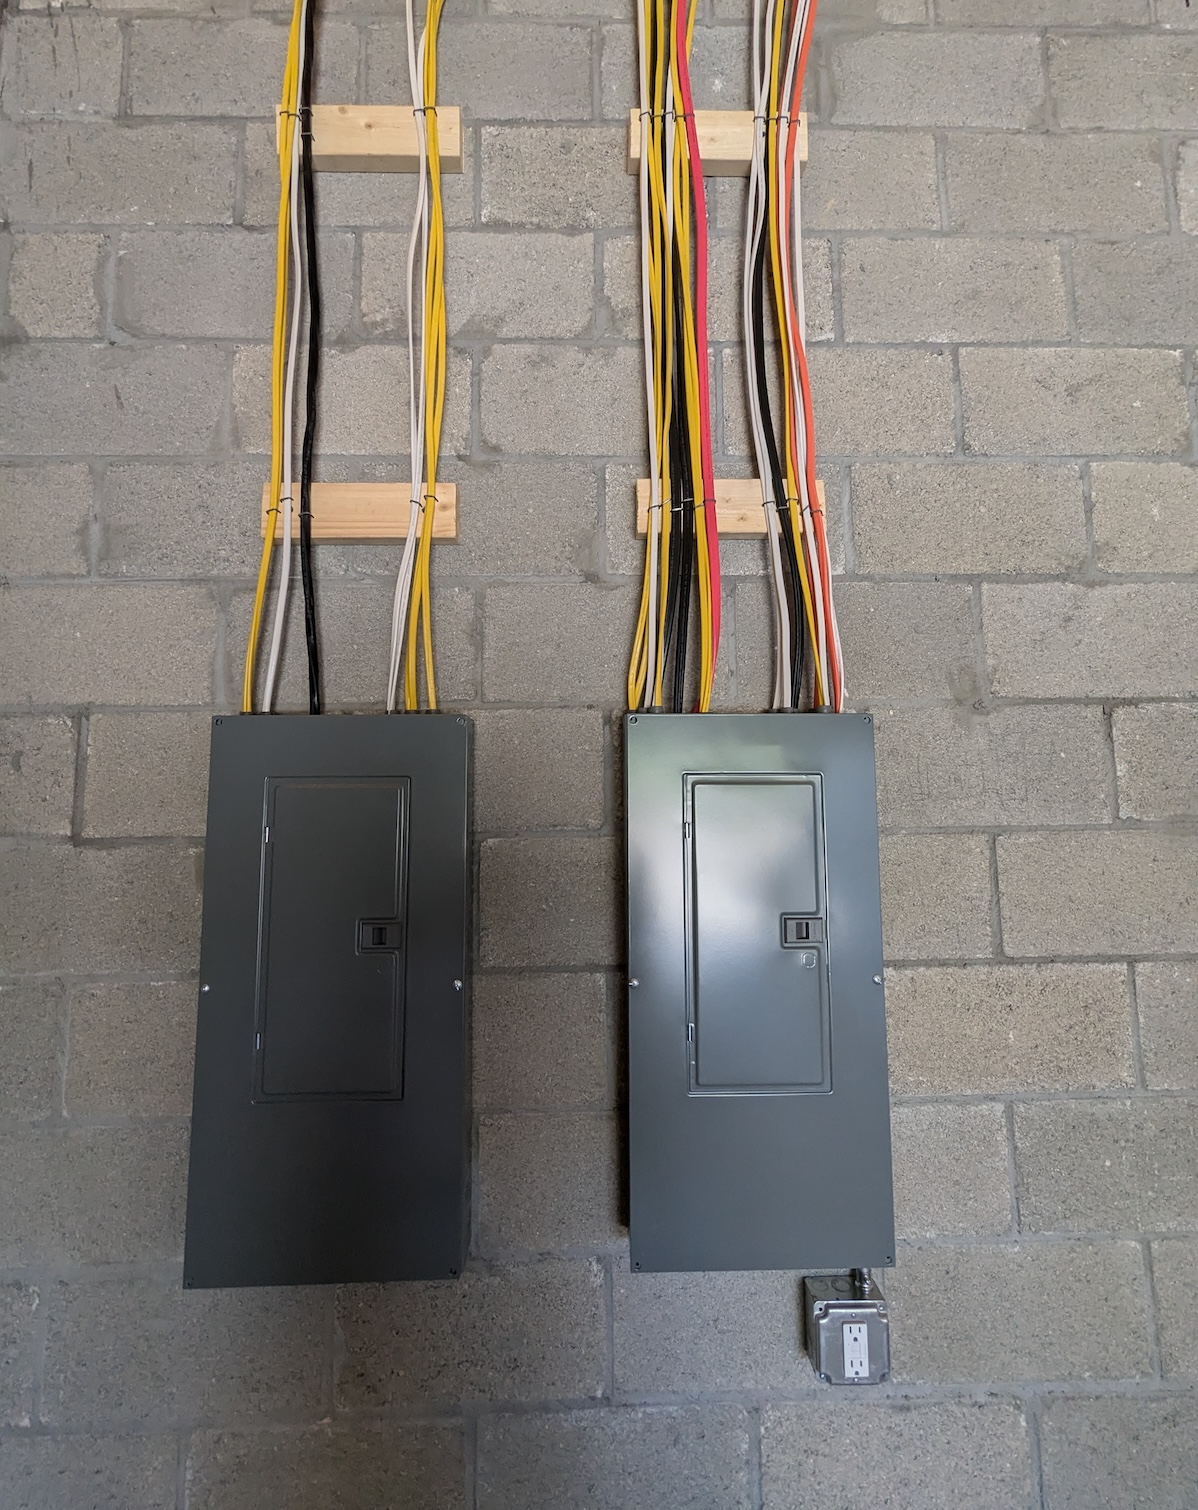
Nevertheless, once we returned from vacation, it was time to dive into electrical work with John, our electrician. I rolled up my sleeves and helped pull wires, handled some basic wiring tasks, and took complete ownership of the doorbell installation. I’m also installing all the nail plates—those crucial metal shields that prevent future nail punctures into wiring that could lead to dangerous shocks! I ended up nailing about 600 of those!

John’s giving us a discounted labor rate thanks to my assistance while we cover materials. Consequently, the shopping list he provided might as well have been written in Greek—imagine trying to purchase items you can’t even visualize! Mid-installation, we made emergency runs to electrical supply stores for panels and various components I’d overlooked.
Pro Tip: When working with an electrician as an owner-builder, ask for their material list at least a week in advance and research each item online. Having pictures of components saved on your phone makes supply store trips far less stressful and prevents costly return trips for missed items.
As a result of our planning, we’re setting up a robust 350 AMP total power supply, cleverly split between a 200 AMP and a 150 AMP panel with the code-required main disconnect outside. We’ve planned ahead with extra capacity, reserving about 100 AMP for a future pool installation.
Sound Planning
I seized this rare opportunity to install the home speaker system I’ve been dreaming about for years. With open walls, it’s the perfect time to do it right. While designed for 8 rooms, our custom setup includes two speakers in the kitchen island area, two in the lanai dining space, and four in the lanai lounge zone.
This solves one of my pet peeves: when we’re entertaining, music playing in the lanai can’t be heard in the kitchen when doors are closed due to Florida heat. Now we’ll enjoy synchronized sound throughout. I’m also running wires from my future DJ booth to the TV, upgrading our karaoke setup from projector to living room TV. And of course, hiding all speaker wires while walls remain accessible. As a final protective measure, I’m sealing all top stud holes with spray foam to prevent termites and other pests from traveling between the roof and inner walls.
Ultimately, the electrical rough-in consumed most of February. John worked six consecutive days trying to complete everything, ultimately returning a week later to connect the panels to the meter box. He came back a few times throughout for final adjustments.
With major structural phases behind us, we brought back our land clearing team for a comprehensive cleanup. We consolidated leftover materials to one corner and lowered the ground around the house perimeter to prepare for stucco application. This adjustment also made ladder placement significantly safer for window installation. The transformation is remarkable—the site is now both visually appealing and safely navigable.

Liquid Flashing: The Waterproofing Wonder
Meanwhile, January’s buck inspection came with an important requirement: liquid flashing application. This specialized white, paint-like substance creates critical waterproofing for window block frames.

In Florida’s challenging climate, this moisture barrier is non-negotiable. It prevents water infiltration between windows and their block openings. Without it, moisture inevitably finds its way inside, damaging interior walls and flooring while creating ideal conditions for mold growth. The application demands precision—carefully coating all sides of each window opening with complete, consistent coverage.
Unfortunately, this task fell squarely on my shoulders, as having the window installers handle it would have been prohibitively expensive. Balancing this with John’s electrical work proved challenging.
Liquid Flashing Calculations
As the dedicated DIYer taking on this critical waterproofing task, I ran the numbers to understand the scope:
Materials Needed:
- 24 window openings to flash (according to our PGT window specs)
- Average window perimeter: 16 linear feet per window
- Total linear footage to flash: 384 linear feet
- Coverage rate of quality liquid flashing: ~30 linear feet per gallon (at 1/8″ thickness)
- Required material: 13 gallons (with 10% waste factor included)
Cost Breakdown:
- Premium liquid flashing material: $45 per gallon = $585
- Application tools (brushes, rollers, caulk guns): $65
- Prep materials (cleaning agents, masking): $40
- Miscellaneous supplies: $30
- Total DIY cost: $720 (approximately $30 per window)
Professional Quote Comparison:
- Contractor quote for application only: $7-9 per linear foot = $2,688-$3,456
- Contractor-supplied materials: additional $800-$1,000
- Total professional cost: $3,488-$4,456 (approximately $145-$185 per window)
Time Investment:
- Average application time: 45 minutes per window opening
- Total time investment: 18 hours (spread over several days to accommodate helping John with the wire pulling)
The DIY approach saved us approximately $2,800-$3,700 while ensuring this critical waterproofing was done to my exacting standards. In Florida’s hurricane-prone climate, proper liquid flashing isn’t just about preventing everyday moisture—it’s essential protection against the driving rains that accompany our tropical storms.
Pro Tip: For liquid flashing application in Florida’s humidity, work early mornings when temperatures are lower. The product applies more evenly, creating a better seal, and you’ll avoid the midday heat that makes the product dry too quickly and potentially crack. Budget twice the time you think it’ll take—methodical application now prevents costly water damage later.
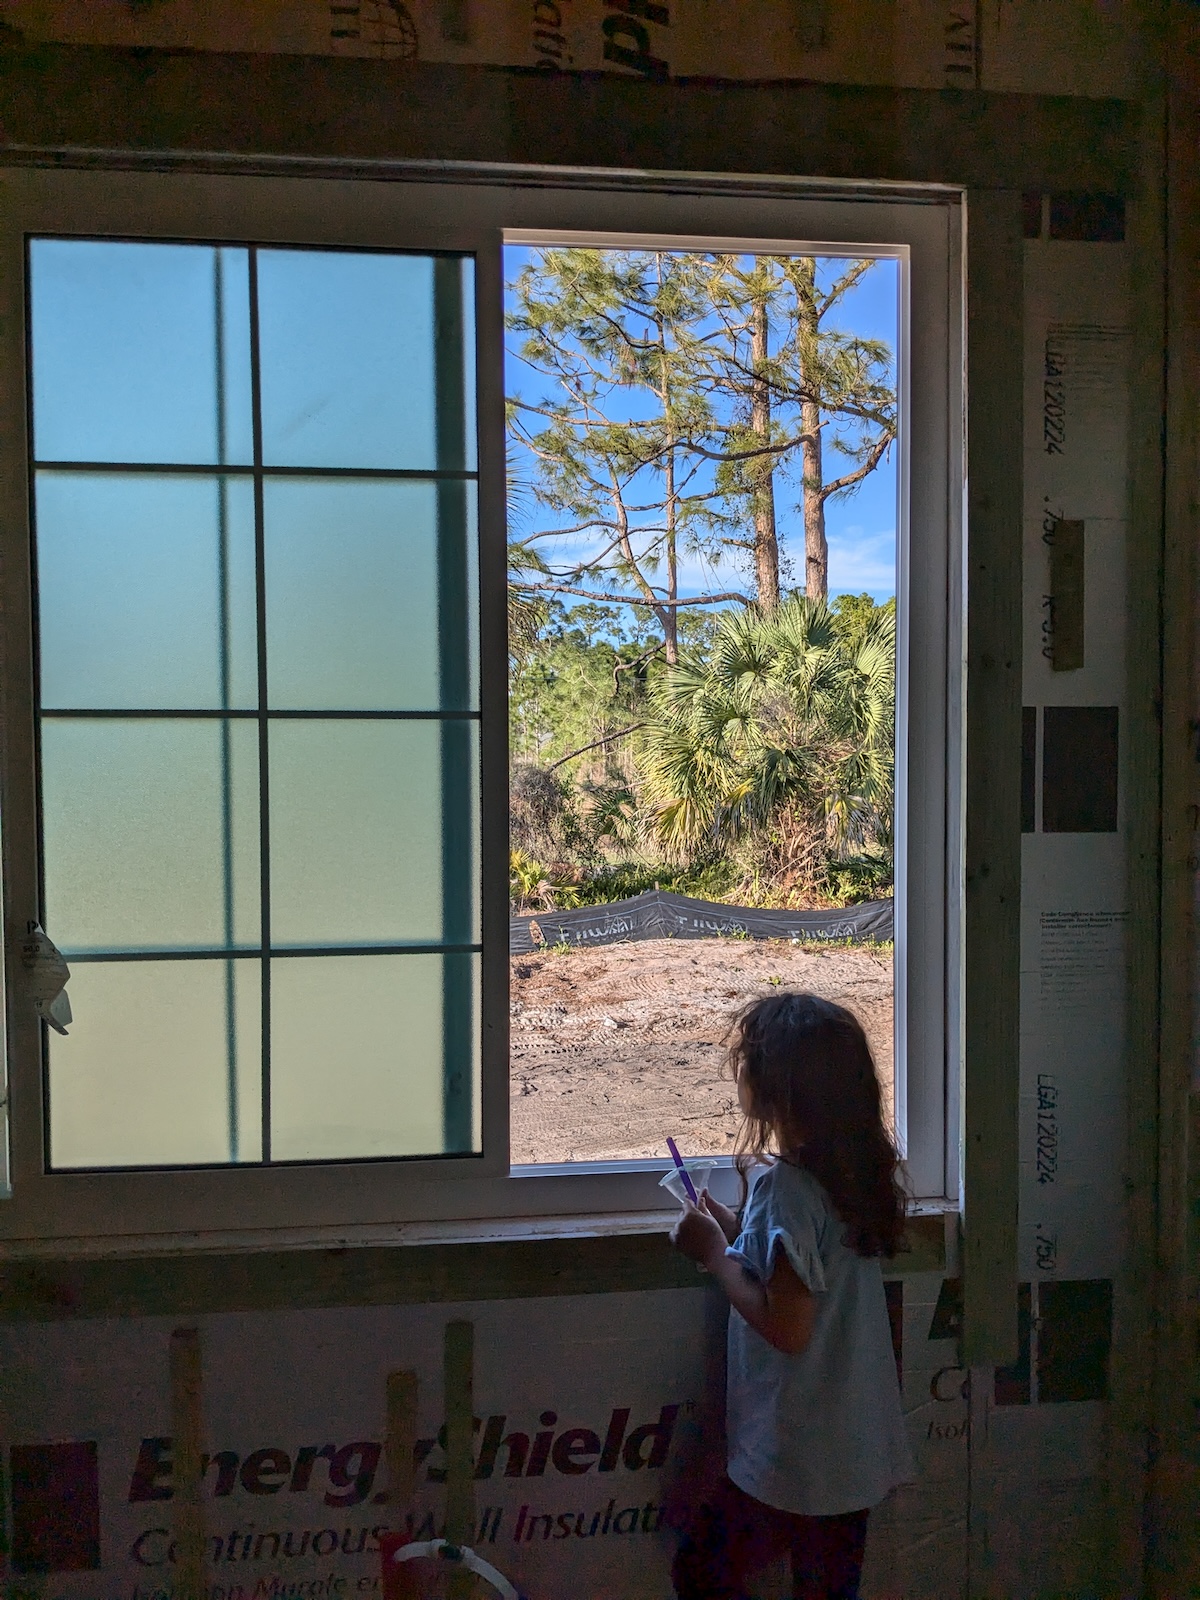
Window installation got pushed to February 24th. Ironically, while vacationing in Clearwater, they called with an earlier opening, so we scheduled for the following week. Their pre-installation inspection went surprisingly well. The supervisor actually complimented the accuracy of our openings, noting that even experienced builders often miss the mark. We only needed minor adjustments to a few spaces and some concrete scraping from the top office and door windows (both non-opening picture windows).
We now have all windows and three of four doors successfully installed. We’re just waiting on a 36×82 lanai door, originally mistakenly ordered as inswing by the sales rep instead of the required outswing. The replacement arrives in early March, though unfortunately, this delay holds up our critical framing inspection.
Preparing for the Big Inspection
The framing inspection represents a major milestone, with comprehensive requirements: all openings covered (except garage doors), complete roofing (shingles scheduled for early March), and “F” channel soffit installation.
Inspectors scrutinize all wood framing and trusses. We’ll need to address the office truss repairs documented in our previous “Office Ceiling Drama” update. Additionally, plumbing, electrical, and HVAC must all pass inspection before this crucial checkpoint.
Mariachi (our framing expert) and Russell will return for one final framing punchout. This thorough assessment examines all studs for integrity after the inevitable drilling from plumbing, electrical, and HVAC work. They’ll verify all load-bearing components are properly secured, check for warped or damaged wood needing replacement, confirm hurricane straps and structural connections, and ensure everything aligns with approved plans. I’m also requesting partial attic flooring with plywood for valuable storage space.
At this point, we’re nearly inspection-ready—just finishing nail plate installation, foam-sealing stud holes, handling minor details, installing roofing shingles, completing the frame punchout, and installing that final door.
Additionally, February also saw Mariachi return to add subceilings and benches to the showers. I realized a 10-foot ceiling was impractically high for comfortable showering—the rain showerhead would feel miles away! The lower ceiling also retains heat better during showers. These insights only become apparent when walking through the actual space.
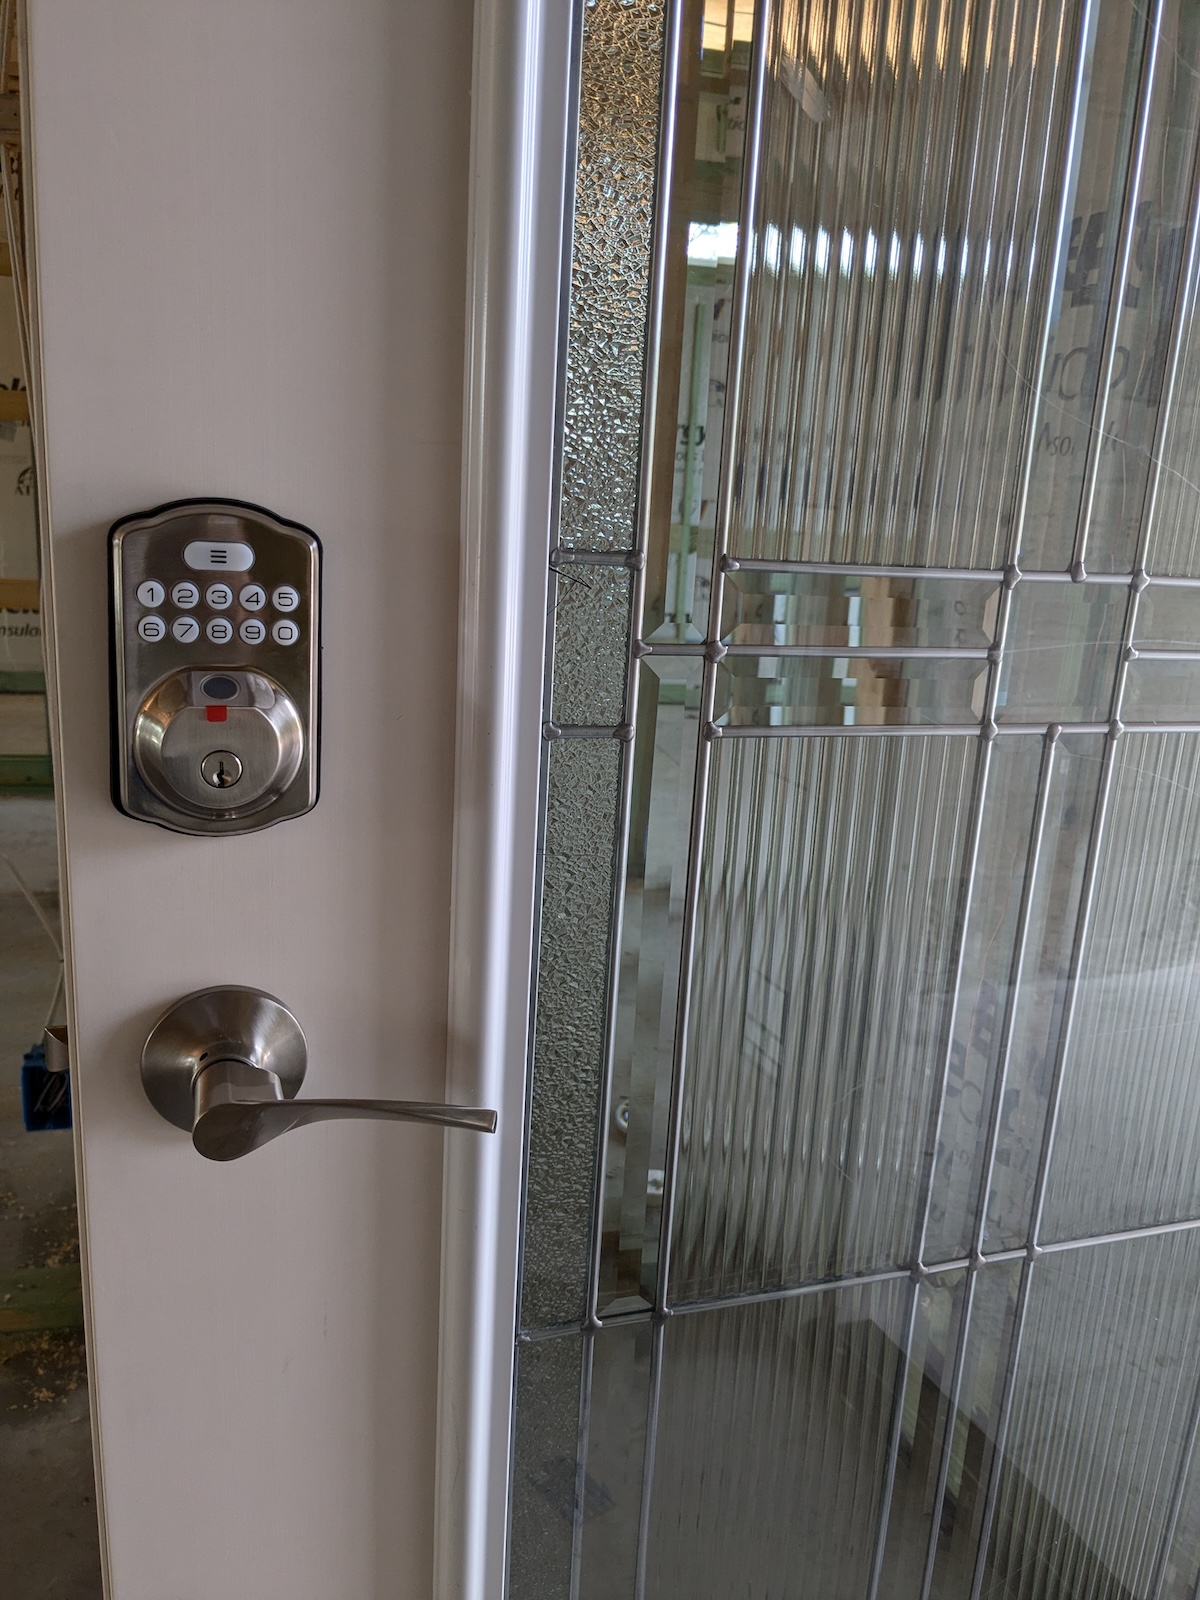
And yes, we installed our front door lock! We officially have keys to our new home. A small but deeply satisfying milestone!
Plumbing Progress
February brought another major achievement: completing and passing the second rough plumbing inspection. The inspector noted a few unsealed top openings and missing nail plates but approved the work, trusting we’d address these minor issues.
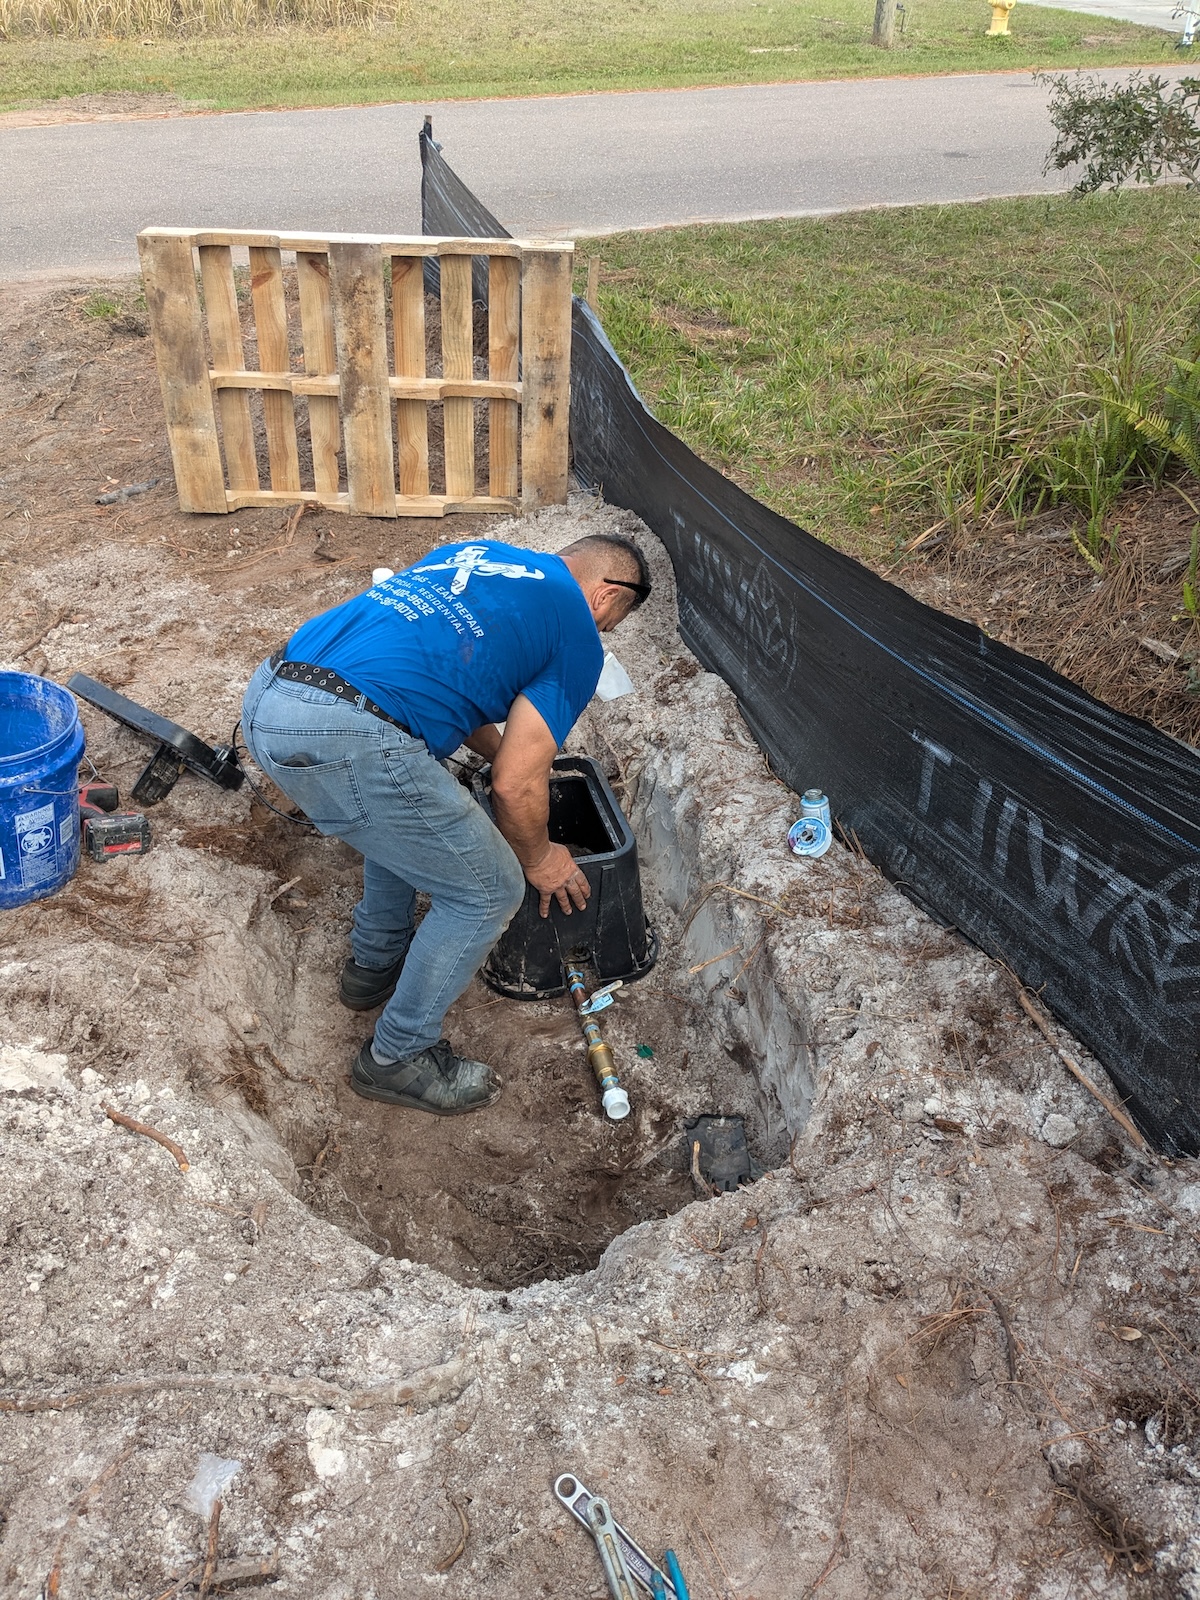
Above all, perhaps most exciting of all—we finally have our own water supply and can retire that 700-foot hose!
Other Updates
We received our garage door delivery, though installation must wait until after stucco completion. After researching and watching installation videos, I’ve decided to install the wall-mounted openers myself with a friend’s help. These are not only safer to install than overhead units but also provide more valuable headroom for additional storage.
Pro Tip: Create a dedicated “build folder” on your phone with subfolders for each construction phase. Take photos of everything—especially open walls before drywall, with clear shots of electrical, plumbing, and HVAC locations. These references become invaluable months later when you need to hang something heavy or troubleshoot an issue without demolishing finished walls.
Project Statistics Dashboard
Project Statistics Dashboard
Square Footage Analysis
Living Space (Conditioned)
Space Breakdown
Cost Comparison Analysis
Project Cost
February by the Numbers
Let’s talk money—because turning a structure into a home isn’t cheap either. February shifted our focus from the heavy construction of January to systems installation and preparation work, which is reflected in our expenses:
- HVAC rough installation: $9,703
- Plumbing (second rough): $3,960
- Electrical materials and installation: $3,549 (This includes all the wiring, panels, breakers, and speaker system components)
- General conditions (dumpster, site cleaning, porta potty): $1,593
- Framing additions (bathroom ceilings, shower benches, *deadwood addition to pantry room and other areas): $1,231
- Special construction materials: $446
- Tools and equipment: $221
- Door locksets and hardware: $180
- Window prep materials: $20
- Foundation material refund: -$506 (for incorrectly delivered materials back in January)
* Deadwood is a solid piece of wood that’s installed behind sheetrock to provide a secure anchor point for hardware.
Total February investment: $20,397
| Project Cost Breakdown (as of February 2025) | ||
|---|---|---|
| Category | Line Item | Total Amount |
| Framing | Truss Manufacturing, Lumber, Labor | $56,913 |
| Doors and Windows | Windows, Exterior Doors, Installation, Garage Doors | $52,636 |
| Masonry | Block Wall Materials and Labor | $43,733 |
| Foundation | Materials and Labor | $38,225 |
| Site Preparation | Land Clearing, Staking, Grading | $14,937 |
| Roof | Shingles and Underlayment | $11,413 |
| Utility Fees | Water Meter Connection | $11,043 |
| HVAC | HVAC System Installation | $9,703 |
| Electrical | Materials and Wiring | $9,547 |
| Plumbing | Underground and Rough Plumbing | $9,520 |
| Professional Fees | Surveys, Energy Analysis, Reports | $7,186 |
| Permit Fees | City and County Permits | $5,829 |
| General Conditions | Porta Potty, Dumpster, Site Services | $4,491 |
| Architectural Fees | House Design | $4,450 |
| Selection Items | Exhaust Fans, Locksets, Fixtures | $1,802 |
| Termite Treatments | Subterranean and Wood Treatment | $1,642 |
| Moisture Protection | Window Liquid Flashing Materials | $764 |
| Construction Equipment | Generator | $748 |
| Administrative Costs | Office Supplies, BuildBook, Security | $685 |
| Special Construction | Special Materials | $446 |
| Design-Related Deliverables | Blueprints Copies | $231 |
| Equipment/Tools | Tools and Equipment | $221 |
| Total Investment to Date | $321,216 | |
After January’s major structural expenses ($122,043), February shows the natural rhythm of a home build with a shift to systems installation at $20,397. This 83.3% decrease in monthly spending demonstrates how costs fluctuate throughout construction phases. Major structural elements are complete, with finishing work ahead in coming months.

Life Behind the Build
February brought some welcome relief. Yuna continues to enjoy her job site visits, and after the intensive electrical work with John, I regained more control over my schedule. The warming weather makes early-morning site arrivals more pleasant, and our newly installed windows block unwelcome drafts. I suspect Tatiana pulled out less hair in frustration this month—though I could be mistaken!
What’s Next? From Skeleton to Shelter: Closing in the Dream
With framing complete, I’m breathing a bit easier, though our pace remains steady. March’s lineup includes electrical inspection, frame punchout, insulation, and possibly stucco finishing, and drywall hanging and finishing. Post-framing inspection, we’ll begin insulating the attic and select interior walls for improved soundproofing between rooms.
We’re racing against Florida’s approaching summer heat, hoping to have electricity functional by April so we can run fans during the hottest hours. Each completed step brings us closer to our dream home, transforming it from skeletal structure to recognizable living space.
Despite daily challenges—from missing materials to unexpected adjustments—watching our vision materialize makes every obstacle worthwhile. Our hands-on approach continues saving substantial money while ensuring our home perfectly reflects our vision.
Stay tuned for our April update featuring insulation, stucco, and drywall adventures as we approach the exciting finishing stages. Questions about our owner-builder journey? Drop a comment below!
Upcoming: Power Lines Connection, Insulation, Stucco Finishing, Drywall Hanging and Finishing


My goodness! it’s shaping into a beautiful home. Great job figuring out the electrical work and learning on the way! And most importantly I’m sure the kiddos are seeing their dad navigate a challenge and taking it head on, and embracing new challenges. You are not only building a foundation but there foundation as well on how to take on the world.
Thanks! You’re right. They’re learning in real time how these challenges are handled. P.S. They just started building next to our current home, so Yuna is now watching another construction happening by her window.